|
Screenshot
Popular Systems Menu |
Markov: Lightning Gun, Assault Rifle, Arc Mines, Personal Shield. Hyde: Flamethrower, Minigun, Toxic Grenade, Personal Shield. Parnell: Combat Shotgun, Multifire Rocket Launcher, Super Soldier, Personal Shield.
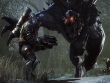
Hunters Abe Custom Shotgun: First tier, deal 14,000 damage. Second tier, deal 29,000 damage to the Monster. Third tier, deal 12,000 headshot damage to the Monster. Stasis Grenades:: First tier, slow down the Monster a total of 130 times. Second tier, slow down the Monster for a total of 800 seconds. Third tier, slow the Monster for 3 seconds 160 times. Tracking Dart Pistol: First tier, dart the Monster 15 different times. Second tier, dart the Monster for 3,000 seconds. Third tier, dart the Monster from a distance of 30 meters 60 times. Rewards: Badge Foreground, Abe Elite Skin Bucket Guided Missile Launcher: First tier, deal 9,000 damage. Second tier, deal 25,000 damage to the Monster. Third tier, have 390 direct hits to the Monster. Sentry Guns: First tier, deal 15,000 damage. Second tier, deal 20,000 damage to the Monster. Third tier, have at least 3 Sentry Guns firing at the same time 30 times. UAV: First tier, cover 3,000-meters in Hunt or Rescue. Second tier, find the Monster a total of 30 times. Third tier, find 25 Stage #1 Monsters in either Hunt or Rescue. Rewards: Cabot, Badge Foreground, Bucket Elite Skin Cabot Rail Cannon: First tier, deal 12,000 damage. Second tier, deal 34,000 damage to the Monster. Third tier, deal 26,000 headshot damage to the Monster. Damage Amplifier: First tier, amplify 9,000 damage. Second tier, amplify 24,000 damage to the Monster. Third tier, amplify 54 damage during a single use 250 times. Dust Tagging: First tier, reveal 70 creatures. Second tier, reveal the Monster 60 times. Third tier, reveal the Stage #1 Monster 25 times. Rewards: Badge Foreground, Cabot Elite Skin Caira Napalm Grenade Launcher: First tier, deal 3,300 damage. Second tier, deal 4,000 damage to the Monster. Third tier, get 170 direct hits on the Monster. Healing Grenade Launcher: First tier, heal 32,000 damage. Second tier, revive 15 teammates. Third tier, heal multiple teammates 900 times. Acceleration Field: First tier, cover a total of 2,200-meters using the Acceleration Field. Second tier, provide a boost to your teammates 74 times. Third tier, cover 50-meters with teammate in a single match 100 times. Rewards: Badge Foreground, Caira Elite Skin Griffin Gauss SMG: First tier, deal 10,000 damage. Second tier, deal 14,000 damage to the Monster. Third tier, deal 8,000 headshot damage to the Monster. Harpoon Gun: First tier, trap the Monster for one second 14 times. Second tier, hold the Monster for a total of 115 seconds. Third tier, harpoon the Monster in mid-air 80 times. Sound Spikes: First tier, plant 15 spikes at least 50-meters apart. Second tier, reveal the Monster 120 times. Third tier, reveal Stage #1 Monster 20 times in Hunt mode. Rewards: Abe, Badge Foreground, Griffin Elite Skin Hank Laser Cutter: First tier, deal 6,000 damage. Second tier, deal 20,000 damage to the Monster. Third tier, deal 5,000 headshot damage. Shield Projector: First tier, shield your teammates from any damage 20 times. Second tier, shield 35,000 damage. Third tier, stop 30 teammates from being incapacitated. Orbital Barrage: First tier, deal 6,600 damage. Second tier, deal 24,000 damage to the Monster. Third tier, damage the Monster 30 times from a distance of more than 50-meters. Rewards: Bucket, Badge Foreground, Hank Elite Skin Hyde Flamethrower: First tier, deal 20,000 damage. Second tier, deal 50,000 damage to the Monster. Third tier, deal 50,000 residual burn damage. Minigun: First tier, deal 4,500 damage. Second tier, deal 15,000 damage to the Monster. Third tier, deal 3,000 headshot damage to the Monster. Toxic Grenades: First tier, deal 11,000 damage. Second tier, deal 32,000 damage to the Monster. Third tier, deal 100 damage to the Monster using a single Toxic Grenade. Rewards: Parnell, Badge Foreground, Hyde Elite Skin Lazarus Silenced Sniper Rifle: First tier, place 200 targets on the Monster. Second tier, your teammates must deal 270 damage by hitting your targets on the Monster. Third tier, have 150 headshot targets on the Monster. Lazarus Device: First tier, use the device a total of four times. Second tier, use the device on teammates 28 times. Third tier, use the device on 3 teammates 25 times. Personal Cloak: First tier, cloak revive 7 creatures using the Lazarus Device. Second tier, cloak revive 22 teammates using the Lazarus Device. Third tier, cloak revive 3 teammates in a single match 25 times. Rewards: Caira, Badge Foreground, Lazarus Elite Skin Maggie Machine Pistol: First tier, deal 8,000 damage. Second tier, deal 21,000 damage to the Monster. Third tier, deal 12,000 headshot damage to the Monster. Harpoon Traps: First tier, harpoon the Monster 40 times. Second tier, harpoon the Monsters 8 times in 14 different matches. Third tier, catch the Monster in 2 traps 50 times. Pet Trapjaw: First tier, follow Daisy for 2,600-meters. Second tier, revive 10 downed teammates with Daisy. Third tier, revive 2 teammates in a single match 30 times. Rewards: Griffin, Badge Foreground, Maggie Elite Skin Markov Lightning Gun: First tier, deal 24,000 damage. Second tier, deal 84,000 damage to the Monster. Third tier, deal 23,000 chained damage. Assault Rifle: First tier, deal 4,000 damage. Second tier, deal 18,000 damage to the Monster. Third tier, deal 10,000 headshot damage to the Monster. Arc Mines: First tier, deal 8,000 damage. Second tier, deal 50,000 damage to the Monster. Third tier, damage the Monster with 2 Arc Mines without taking any damage 60 times. Rewards: Hyde, Badge Foreground, Markov Elite Skin Parnell Combat Shotgun: First tier, deal 19,000 damage. Second tier, deal 75,000 damage to the Monster. Third tier, deal 31,000 headshot damage to the Monster. Multifire Rocket Launcher: First tier, deal 32,000 damage. Second tier, deal 64,000 damage to the Monster. Third tier, get 900 direct hits to the Monster. Super Soldier: First tier, deal 17,000 damage. Second tier, deal 58,000 damage to the Monster. Third tier, deal 20,000 headshot damage. Rewards: Badge Foreground, Parnell Elite Skin Val Armor-Piercing Sniper Rifle: First tier, place 12 targets on the Monster. Second tier, your teammates must deal 12,000 bonus damage to the Monster. Third tier, place 30 headshot targets on the Monster. MedGun: First tier, heal 16,000 damage. Second tier, revive 12 downed teammates using the MedGun. Third tier, heal 40 teammates before they are incapacitated. Tranquilizer Gun: First tier, tranquilize the Monster 14 different times. Second tier, tranquilize the Monster for 400 seconds. Third tier, tranquilize the Monster from 100-meters or 60 times. Rewards: Lazarus, Badge Foreground, Val Elite Skin Monsters Goliath Rock Throw: First stage, deal 12,000 damage. Second stage, damage multiple targets 35 times. Third stage, hit mid-air Hunters 150 times. Leap Smash: First stage, deal 12,000 damage. Second stage, damage multiple targets 50 times. Third stage, hit the Hunters from 20-meters 50 times. Fire Breath: First stage, deal 12,000 damage. Second stage, damage multiple targets 175 times. Third stage, hit mid-air Hunters for 80,000 damage. Charge: First stage, deal 8,000 damage. Second stage, damage multiple targets 50 times. Third stage, hit multiple Hunters 100 times. Rewards: Kraken. Badge Foreground, Goliath Elite Skin Kraken Lightning Strike: First stage, deal 20,000 damage. Second stage, damage multiple targets 50 times. Third stage, deal damage to multiple Hunters 80 times. Banshee Mines: First stage, deal 27,000 damage. Second stage, deal 80,000 damage to the Hunters. Third stage, deal damage to multiple Hunters 60 times. Aftershock: First stage, deal 15,000 damage. Second stage, damage multiple targets 40 times. Third stage, deal damage to multiple Hunters 60 times. Vortex: First stage, deal 30,000 damage. Second stage, damage multiple targets 80 times. Third stage, knock back 360 mid-air Hunters. Rewards: Wraith, Badge Foreground, Kraken Elite Skin Wraith Wrap Blast: First stage, deal 30,000 damage. Second stage, damage multiple targets 90 times. Third tier, damage multiple Hunters 15 times. Abduction: First stage, abduct a total of 35 targets. Second stage, abduct 45 mid-air Hunters. Third tier, abduct Hunters from a team 225 times. Decoy: First stage, deal 12,500 damage using Decoy. Second stage, deal 32,000 damage to Hunters using Decoy. Third tier, stealth pounce 30 times while remaining invisible. Supernova: First stage, deal 34,500 damage using Supernova. Second stage, deal 125,000 damage to Hunters using Supernova. Third tier, deal damage using abilities 70 times while the Supernova is activated. Rewards: Badge Foreground, Wraith Elite Skin
Armadon Both Hunters and Monsters gain 35% damage resistance. Does not affect shield or armor. Basking Cephaladon Monsters get 100% increased Feeding Speed. Hunters get some sort of wildlife-repellent. Blitzleopard Provides increased jumping altitude to Hunters. Grants 50% increased Climbing Speed to Monsters. Canyon Strider Provides 35% increased movement speed to both Hunters and Monsters. Crowbill Sloth Provides 35% increased damage output to both Hunters and Monsters. Mammoth Bird Provides 50% reload speed and the ability to switch quickly to Hunters. Provides all abilities receive 50% decreased cooldown time to Monsters. Marsh Strider Provides 35% increased movement speed to both Hunters and Monsters. Megamouth Provides additional speed when executing Stealth Pounce for Monsters. Hunters receive decreased cooldown time for special ability. Nomad Hunters receive decreased recharge time for the Jet Pack. Monsters receive special ability cooldown reduction time. Obsidian Grub Hunters cannot be knocked down. Monsters regenerate armor much faster. Reaver Hunters spend 35% less fuel while flying. For Monsters, scared birds do not alert the Hunters. Spotter Hunters get the ability to see the outlines of creatures within a radius of 50-meters. Monsters, they receive 200% increased smell range within a radius of 100-meters. Steamadon Both Hunters and Monsters cam slow an opponent for one second after being shot at. Tyrant Both Hunters and Monsters will regenerate HP over time. Venomhound Adds Poison Damage to the attack delivered by the Monsters and Hunters.
Hunter benefits Armored Turrets Available on: Colonial Water & Power, King’s Fort, New Calico, Salveron Industries Effect: Only appears in Defend Mode if Hunters win the previous round. They are very strongly armored against the Monster and its minions. Attack Drones Available on: The Dam, Wraith Trap Effect: Search the map and damage the Monster. Birds Available on: Distillery, MedLab, Refueling Tower, Weather Control Effect: Fly across the map and reveal the Monster’s location for the Hunters. Cargo Ship Available on: Aviary, Fusion Plant, Rendering Plant, Weather Control, Wraith Trap Effect: Reveals the Monster’s location for the Hunters. Clear Skies Available on: Aviary, Fusion Plant, MedLab, Refueling Plant Effect: Predators go into hiding. Colonists Available on: Barracks, Refueling Tower, The Dam, Wraith Trap Effect: Two Colonists join your team and hunt down the Monster. Ebonstar Ally Available on: Orbital Drill, Rendering Plant, The Dam Effect: Ebonstar Allies soldiers fight alongside the Hunters. They appear after the Hunters help defend the Barracks. Fair Weather Available on: Armory, Barracks, Distillery, Orbital Drill, Rendering Plant, The Dam, Weather Control, Wraith Trap Effect: Negates all harmful weather effects and provides natural lightning. Forcefield Available on: Armory, Barracks, Rendering Plant, Wraith Trap Effect: Confined space marked by large transparent blue walls in which the Monster gets trapped. The Forcefield shrinks gradually, allowing the Hunters to deal additional damage to the Monster. MedBays Available on: Aviary, Distillery, Weather Control Effect: Distributed by the MedLab and allow Hunters to heal and remove strikes. Scent Masking Available on: Aviary, MedLab Effect: Negates the Monster’s ability to smell and locate the Hunters. Sentry Guns Available on: Refueling Tower, Weather Control, Wraith Trap Effect: Deployable weapons that attack the Monster and its minions. Space Laser Available on: Barracks, Rendering Plant Effect: Vright-red laser targets the Monster from above and does large amounts of damage. Teleport Gates Available on: Armory, Fusion Plant, Refueling Tower, Rendering Plant, The Dam Effect: Small amount of bright-blue Teleport Gates appears on the map. Stepping inside one them sends the Hunters to a central location. Monster benefits Armored Minions Available on: Colonial Water & Power, King’s Fort, New Calico, Salveron Industries Effect: Opposite of Armored Turrets and only appear in the last round of Evacuation if the Monster won the fourth round. Grants additional armor to minions. Canyon Striders Available on: Barracks, Orbital Drill, Refueling Tower, The Dam, Wraith Tap Effect: Adds extra Canyon Striders on the map, allowing the Monster to feed more frequently and gain two-bars energy per kill. Carnivorous Plants Available on: Aviary, MedLab, Refueling Tower Effect: Carnivorous plants spawn, making the Hunters' movements more dangerous. Ebonstar Corpses Available on: Orbital Drill, Rendering Plant, The Dam Effect: Corpses provide additional energy for the Monster. EMP Available on: The Dam, Wraith Trap Effect: Prior to an EMP strike, a small yellow circle appears on the ground. If a Hunter is caught in it, he or she cannot use their Class Ability temporarily. Falling Satellite Available on: Barracks, Rendering Plant Effect: A satellite is destroyed, sending parts falling. If a Hunter gets hit, he or she receives massive damage. Hostile Wildlife Available on: Aviary, MedLab Effect: Wildlife drink contaminated water and attack Hunters aggressively. Man-Eating Eels Available on: Armory, Barracks, Rendering Plant, Wraith Trap Effect: Eels attack Hunters and are friendly to the Monster. Mutated Plants Available on: Aviary, Distillery, Weather Control Effect: Mutated Plants attack the Hunters and give health to the Monster. Phantoms Available on: Distillery, MedLab, Refueling Tower, Weather Control Effect: Phantoms target the Hunters from above and deal serious damage. Radioactive Clouds Available on: Refueling Tower, Weather Control, Wraith Trap Effect: Toxic-green gas deals damage to Hunters as they walk through it. Second Monster Available on: Aviary, Fusion Plant, Rendering Plant, Weather Control, Wraith Trap Effect: Miniature monster follows the primary Monster and attacks the Hunters on sight. Storms Available on: Armory, Barracks, Distillery, Orbital Drill, Rendering Plant, The Dam, Weather Control, Wraith Trap Effect: Simple weather change that makes it slightly more difficult to locate the Monster. Teleport Rifts Available on: Armory, Fusion Plant, Refueling Tower, Rendering Plant, The Dam Effect: Teleport the Monster to different locations across the map.
Val: Armor-Piercing Sniper Rifle, MedGun, Tranquilizer Gun, Healing Burst. Lazarus: Silenced Sniper Rifle, Lazarus Device, Personal Cloak, Healing Burst. Caira: Napalm Grenade Launcher, Healing Grenade Launcher, Acceleration Field, Healing Burst.
Rock Throw: First stage, deal 12,000 damage. Second stage, damage multiple targets 35 times. Third stage, hit mid-air hunters 150 times. Leap Smash: First stage, deal 12,000 damage. Second stage, damage multiple targets 50 times. Third stage, hit the hunters from 20-meters 50 times. Fire Breath: First stage, deal 12,000 damage. Second stage, damage multiple targets 175 times. Third stage, hit mid-air hunters for 80,000 damage. Charge: First stage, deal 8,000 damage. Second stage, damage multiple targets 50 times. Third stage, hit multiple hunters 100 times. Rewards: Kraken, Badge Foreground, Goliath Elite Skin Kraken Lightning Strike: First stage, deal 20,000 damage. Second stage, damage multiple targets 50 times. Third stage, deal damage to multiple hunters 80 times. Banshee Mines: First stage, deal 27,000 damage. Second stage, deal 80,000 damage to the hunters. Third stage, deal damage to multiple hunters 60 times. Aftershock: First stage, deal 15,000 damage. Second stage, damage multiple targets 40 times. Third stage, deal damage to multiple hunters 60 times. Vortex: First stage, deal 30,000 damage. Second stage, damage multiple targets 80 times. Third stage, knock back 360 mid-air hunters. Rewards: Wraith, Badge Foreground, Kraken Elite Skin Wraith Wrap Blast: First stage, deal 30,000 damage. Second stage, damage multiple targets 90 times. Third tier, damage multiple hunters 15 times. Abduction: First stage, abduct a total of 35 targets. Second stage, abduct 45 mid-air hunters. Third tier, abduct hunters from a team 225 times. Decoy: First stage, deal 12,500 damage using Decoy. Second stage, deal 32,000 damage to hunters using Decoy. Third tier, stealth pounce 30 times while remaining invisible. Supernova: First stage, deal 34,500 damage using Supernova. Second stage, deal 125,000 damage to hunters using Supernova. Third tier, deal damage using abilities 70 times while the Supernova is activated. Rewards: Badge Foreground, Wraith Elite Skin
Bucket: Guided Missile Launcher, Sentry Guns, UAV, Cloaking Field. Cabot: Rail Cannon, Damage Amplifier, Dust Tagging, Cloaking Field. Hank: Laser Cutter, Shield Protector, Orbital Barrage, Cloaking Field.
Maggie: Machine Pistol, Harpoon Traps, Pet Trapjaw, Mobile Arena. Griffin: Gauss SMG, Harpoon Gun, Sound Spikes, Mobile Arena. Abe: Custom Shotgun, Stasis Grenades, Tracking Dart Pistol, Mobile Arena.
Recently added games to Cheating Dome
|
All Systems
 |