This is a special plasma rifle. It can be obtained from Harkness after siding with him in the "Replicated Man" quest. It can be repaired with regular plasma rifles, but degrades slowly. Its damage is 50.
Abraham Lincoln shrine in Arlington Cemetery North
The house with the Luck bobblehead also contains a hidden shrine to Abraham Lincoln.
Go to the Minefield then head north if you keep going you'll eventually pick up a radio signal from the alien space craft when you find it there is a space craft and special gun with limited ammo.
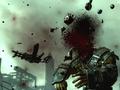
This is a special weapon. It can be obtained from the body of a dead alien lying a few feet away from its crashed spaceship. The alien crash site is found north of MDPL-13 Power Station and northwest of the Greener Pastures Disposal Site. It has unique ammunition as well, the Alien Power Cell, which is exceedingly rare. The chance of a critical strike with this gun is nearly 100%. It can be repaired with the Firelance, but degrades incredibly quickly. Its damage is 100.
This is a special scoped .44 Magnum. The Blackhawk is obtained from Agatha in the "Agatha's Song" quest in return for the Sheet Music book. You must ask for a reward. There is a higher chance of the weapon being in good condition if you speak politely to Agatha throughout the quest. It can be repaired with regular scoped .44 Magnums. Its damage is 55.
The .233 pistol's design is a reference to the pistol carried by Harrison Ford's character, Rick Deckard, in the movie Blade Runner.
Collect the following hidden bobbleheads to gain +10 to a skill or +1 to a stat.
Stats
Strength: Megaton, in Sherriff Lucas Simm's house.
Perception: Republic Of Dave, on a bookshelf on the right in the Museum of Dave.
Endurance: Deathclaw Sanctuary, at the entrance on a table next to a rotting Brahmin corpse.
Charisma: Vault 108, in the Cloning Lab.
Intelligence: Rivet City, on Dr. Li's table in the Science Lab.
Agility: Greener Pastures Disposal, in the small office covered in radiation.
Luck: Arlington Cemetery North, in the basement on a shelf directly below the stairs inside the house to the north.
Skills
Barter: Evergreen Mills, in back of the Market Bazaar on a shelf in the upper-right side behind the Raider Trader that does not attack.
Big Guns: Fort Constantine, in the basement of the CO Quarters inside a safe in the wall.
Energy Weapons: Ravenhold
Explosives: WKML Broadcast Station, turn on your local map. Go through the doorway to the sealed cistern and find it.
Lockpick: Bethesda Ruins, in Bethesda Offices East on the top floor near the door to the bridge.
Medicine: Vault 101, on your dad's desk when leaving.
Melee Weapons: Dunwich Building, just before you leave the Virulent Underchambers, on the floor next to the door.
Repair: Aerefu, in Evan King's house.
Science: Vault 106, on a table in middle of the living quarters second level main room.
Small Guns: National Guard Depot, go through the training room and offices to exit from a door to the main room. Use the power switch on the wall to your left and enter the Armory door, then search the shelves.
Sneak: Yao Guai Tunnels, on top of a metal box in the Den, on the right of the map near some water.
Speech: Paradise Falls, on a table inside Euology's pad (Slave Master's house).
Unarmed: Rockopolis, go directly west from Casey Smith's garage. Look for tattered banners that are strung up. Use your local map to find it.
Here’s a great (albeit cheap) way to gain lots of experience. Before you do anything that’s going to net you some experience (such as picking locks, hacking, et cetera), change the game’s difficulty setting to Very Hard. Then, hack the computer or pick the lock (or whatever). Successfully doing so on a harder difficulty level will get you more experience. You can also utilize this technique on mortally-wounded enemies to gain more experience from them as well. Just be sure to change the difficulty back to a more manageable level when you’re done!
This is a schematic weapon. It is built from a lunchbox, a cherry bomb, a sensor module, and ten bottle caps. The schematics can be obtained from Moira in Megaton, Knick-Knack in Little Lamplight, Herbert Dashwood's sale in Tenpenny Tower, and Jocko's Pop & Gas Stop. Every schematic increases the number of mines created per set of materials, up to a maximum of three. Its damage is 501.
If you come upon a Brahmin anywhere in the wasteland (a Brahmin, not a pack Brahmin) you can crouch and hit the interact button to tip the Brahmin over.
Complete each condition to get the allotted Trophies.
| Unlockable | How to Unlock
|
|---|
| - Completed "Agatha's Song".
|
| - Reached Level 14 with Good Karma.
|
| - Completed "Big Trouble to Big Town".
|
| |
- Doesn't Play Well with Others
| |
| |
- Finding the Garden of Eden
| - Completed "Finding the Garden of Eden".
|
- Following in His Footsteps
| - Completed "Following in His Footsteps".
|
| - Completed "Galaxy News Radio".
|
| - Reached Level 14 with Bad Karma.
|
| - Completed "Head of State".
|
| - Reached Level 8 with Neutral Karma.
|
| |
| - Completed "Picking up the Trail".
|
| - Reached Level 14 with Neutral Karma.
|
| - Reached Level 8 with Good Karma.
|
| - Placed a grenade or mine while pickpocketing.
|
| - Reached Level 8 with Bad Karma.
|
| - Completed "Reilly's Rangers".
|
| - Completed "Rescue from Paradise".
|
| - Completed "Scientific Pursuits".
|
| |
| - Completed "Stealing Independence".
|
| - Completed "Strictly Business".
|
| - Completed "Tenpenny Tower".
|
| - Completed "The American Dream".
|
| |
| - Completed "The Nuka-Cola Challenge".
|
| - Completed "The Power of the Atom".
|
| - Completed "The Replicated Man".
|
| - Completed "The Superhuman Gambit.
|
- The Wasteland Survival Guide
| - Completed "The Wasteland Survival Guide".
|
| - Completed "The Waters of Life".
|
| |
| - Completed "Tranquility Lane".
|
| - Completed "Trouble on the Homefront".
|
- Vault 101 Citizenship Award
| |
- You Gotta Shoot 'Em in the Head
| - Completed "You Gotta Shoot 'Em in the Head".
|
The Burnmaster is a very powerful flamethrower. It is found at the Franklin Metro Utility inside the Falls Church Metro.
Here’s an interesting way to avoid becoming encumbered by holding too much gear and too many items. Say you pick up a heavy piece of gear, like forty pound Power Armor, but when it’s added to your inventory, it makes you encumbered. Drop the item and then press the right analog stick (or corresponding button for PC gamers) to pick the item up and hold it in front of you. Since it’s being held and is therefore not part of your inventory, you won’t be charged for its weight and can get to where you need to go from there without being too encumbered.
The first part of the schematic for the Dart Gun are found at the MDPL-05 Power Station on the northwest tip of the Capital Wasteland. Another part is obtained from Hannibal Hamlin after completing the "Lincoln Memorial" quest for the slaves. The last schematic is found in a locked chest at the Boutique Le Chic in Tenpenny Tower. Parts required are a toy car, surgical tubing, paint gun, and Radscorpion poison gland. The Dart Gun cripples your target's legs. It is very useful when used on fast melee opponents such as Deathclaws. It also poisons your target for eight seconds.
Defeating robots in the Wastelands
Run up a steep hill with the robot at the bottom. Some robots have problems shooting upwards at a steep angle. Shoot at them as you are running up the hill to destroy them easily.
Die Hard series reference
In the quest "Those!", after you and Brian Wilks arrive in Grayditch, he will tell you about his father and where his home is (other things may be asked though). After you agree to check if his father is alive, Brian will go into one of the radiation preservation shelters. When he enters, sooner or later the phrase "Now I know what a TV dinner feels like" can be heard. This is a reference to a line Bruce Willis mutters when he is crawling through an air conditioning vent in one of the Die Hard movies.
The aid item, "Mentats" or "Mentat's Tablets" is a reference to the famous science fiction novel series by Frank Herbert titled Dune. Mentats are "human computers" -- people who are trained and molded with the abilities to filter and process data with extraordinary precision and speed. Such people came about in the series due to the "Butlerian Jihad" or "Machine Crusade" where thinking machines became the enemy of the human race.
Easy "Silver-Tongued Devil" trophy
Use the "Infinite XP" Speech trick to easily get the "Silver Tongued Devil" trophy.
Note: This trick requires you take the "evil" path. After agreeing to help Mr. Burke nuke Megaton, go into every single house and steal everything (any little piece of junk you can carry). Sell them to the local shops (Craterside Supplies, The Restaurant, Moriarty's Saloon, etc.). If a particular house is locked or you need a key to get into a safe or something of that nature, just kill the owner of the property, and get the key from his or her body. Kill everyone in sight, especially the shop owners because you can get access to their entire inventory, plus the Caps that you have already spent on them. Kill every one and collect everything to leave Megaton empty. You should have at least 600 caps. Remember to sell some of the things you gather to the shop owners because you cannot fast travel when over encumbered. This can be done in almost any town you visit. To avoid getting over encumbered, get all the supplies that you can possibly carry, then drop the rest just outside of Megaton. Fast travel to Rivet City or some other marketplace. Sell what you have, then return to Megaton, and repeat the process.
In the "Strictly Business" quest, capture Susan Lancaster, and get your reward for her capture. Afterwards, speak with her in the slave quarters part of Paradise Falls. Note: You will need one of the slaver's keys to access the slaves quarters; pickpocket one. After entering the slave quarter's, speak with Susan. When she asks for help, choose the option "You're a slave. Deal with it.", then return to Grouse to collect the reward again. Grouse will think that you captured her again. You can repeat this as many times as desired to get 250 Caps and a slave collar each time.
Save all pre-war books you found (not scorched or ruined). Go to the Arlington library. At the southeastern corner, you can find an NPC that will buy those books for 100 Caps each. You will also get 10 experience points for each book you sold.
Do the "Riley's Rangers" side quest. After rescuing Riley and escorting her back to her base, she will ask if you want to help her out by mapping the area, and she will pay you. Do not tell her that you will help her just yet. After reaching level 20, use the "Explorer" Perk. Once you have revealed every location on the map, go back to her, and tell her that you will help her out. Then, tell her you have got some new locations for her. Depending on whether or not you have already done it, you can make upwards of 2,200 Caps.
When creating a character, tag the Speech skill. After exiting Vault 101 and reaching level 2, put all your skill points in Speech. This will allow you to easily exploit the glitch. Go to BigTown, located just east of Arefu. You may need to go to Megaton and speak to Lucy West to obtain the Arefu marker if it is your first run through. Talk to everyone in BigTown, leaving Pappy for last. He has a "Speech" option that remains for the duration of the game. Every success you get using the "Speech" option will net you 6 experience points. Multiple successes will stack, leading to larger point gains. There is no need to wait for fear of losing experience points. Just continue to use the "Speech" option until you level. You must stop talking to him to distribute points. Save the game after leveling up each time, as the game has a tendency to glitch which cause the loss of all your progress.
Only use three attempts during a hack, so you leave yourself with one to back out. Then, go back to the attempts screen, and you will have four more chances. Repeat this as many times as desired.
If you move your cursor throughout the symbols, sometimes you will highlight a group of symbols. Selecting these "duds" will remove one of the words that is wrong from your choices. Also, it may grant you an additional attempt if you have already gotten a selection wrong.
Search around both fields, and you will find a string of symbols that you can enter as the password. It starts with "(", "<", "[", or "{" and ends with the same symbol. This will completely refill your password attempts.
To hack "Very Easy" and "Easy" computers (and "Average" if your skill level is high enough), look for the secret characters first. If you find enough of them, there will often be fewer than four passwords remaining after the duds are removed.
To hack "Average", "Hard", and "Very Hard" computers, use the following steps. Look for common suffixes, such as "-ing" or "-ed". You can even go one step further by adding repeated letters that precede them, as in "-ted", "-ded", "-ling", "-ring", etc. Write down or remember the entire list of words in suffix groups. Choose a word from one of the suffix groups, preferably the largest one, and look for words with the precise number of matching letters. Use the suffixes as a filter. For example, if you found that the word "SUFFERING" had two matching letters, any words in the "-ing" suffix group would be excluded, but if it had five matches, chances are "-ering" is the proper suffix. This is usually, though not always, true. In the previous example, a match for "SUFFERING (5/9)" might be "FALTERING", but could also be "SUBMARINE".
Easy Hacking, Speech, and Stealing bonuses
Save the game before starting a dialogue with a Speech bonus, hacking a computer, lock picking, or pick pocketing. Then, simply reload the game if you fail the challenge.
Easy Karma level trophies
An easy way to get multiple "Reach level ? with ? Karma" trophies is to remain neutral for the duration of the game. When you are getting close to one of the notable trophy levels (8, 14, or 20), save the game. Then, turn evil or good by completing a quest for good Karma or murdering random characters for bad Karma. This will send you into the good or bad Karma statuses while giving you experience. Once you get the trophy for reaching a certain level with bad or good Karma, reload your saved game, and continue as usual with neutral actions. It is easiest to neutrally level somewhere with a lot of enemies, such as the D.C. area with Super Mutants, or subways or caves with Ghouls and Mirelurks. Note: Using this trick is easiest with a neutral/bad character because once you get close to reaching a notable level, you can just go to Megaton, Rivet City, or another major settlement and kill people to get experience. After leveling, reload the game, and no one will be mad at you.
Use the following trick to avoid breaking bobby pins when trying to pick a lock. Just before the bobby pin is going to break, exit that screen, then go back. You will save a lot of bobby pins by doing this. This also works when trying to get a password for computers.
When you see an item on a shelf or table in a store or house where there are too many people around to steal it, walk over to the item, get it in your crosshairs, and press R3 to pick the item up. Then, take the item to an area where no one is, drop it, and steal it. For example, use the Bottle Cap Mine in the Craterside Supply on the work bench, pick it up, then drop it at the end of the desk to the right next to the two metal boxes. Enter Sneak mode, get next to the desk once your indicator says hidden, and steal it.
Complete the "Reilly's Rangers" quest and ask for one of Brick's miniguns. Alternately, kill Brick and take her minigun.
This is a special Fat Man. It is found in the bomb shelter section of the Guard Depot. All five Keller Family Transcripts must be found first. It fires eight mini-nukes at once in a random spread pattern. This does lots of damage, but is essentially useless other than for entertainment value, or for leveling entire towns. Its damage is 1610 x 8.
If you’re running out of room in your inventory and don’t want to ditch any of your gear, consider trying to find a companion character. These companions can be found at various places throughout the world and will agree to join you on your journey (temporarily). You can trade equipment with these characters, which will allow you to dump your equipment on them, making you virtually unencumbered. Consider this option when you not only need help with bad guys, but help carrying your crap as well!
Falling long distances without dying
If you are falling a long distance, such as off a bridge or cliff, save the game in mid-air close to the ground, and reload it. You will land safely on the ground.
Enter the museum, and examine the notice on the wall terminal to the far right. The text is about a virus infecting their Archetype, and at the end, it repeats parts of the song "Archetype" by Fear Factory: "the infection has been removed, the soul of this machine has improved."
Dogmeat is found in Scrapyard. On the world map, Scrapyard is in the top right corner of the square that is two squares directly below Minefield. Follow the clear triangle on your compass if you are having problems finding it. Enter Scrapyard, and look/listen for fighting. Your will find Dogmeat fighting a Raider. Once the Raider is dead, you can talk to Dogmeat and ask him to join you.
This is a special power fist. Fisto! can be found next to a computer on a desk in the upper area of the Derelict Power Plant across from MDPL-13 Power Station. It can be repaired with regular power fists. Its damage is 31.
Free Evil Items at Paradise Falls
If you have bad karma (or don’t mind having even worse karma), head over to Paradise Falls, a place a group of evil slavers call home. To gain entrance without having to open fire, you have to be friendly with the slavers, which will give you an evil slant. But if you can do this, you’ll find a guy endlessly walking around the settlement (he’s usually at or near the bar, but can be elsewhere). When you get near him, he’ll stop you automatically, tell you he found some cool stuff on a recent raid, and give you some of what he got (it will be either some ammunition, Bottle Caps, or various aid items). After your first encounter, all you have to do is keep speaking to him to earn more and more free stuff.
Getting both rewards in "The Replicated Man" quest
When you discover the identification of the android and are deciding to turn him in or warn him, go to the android first. Convince him to go to Zimmer on his own, and he will reward you. After that, go to Zimmer in the science lab. Tell him about the android's identity. He will also reward you. Note: You will still get bad karma.
You can get both rewards if you go to Harkness (the android) first and agree to help him. One option when you agree to help him is gaining permission to kill Dr. Zimmer and his bodyguard. You will get the plasma rifle from Harkness and then can go to the science lab. At that point you can betray Harkness and tell Zimmer his identity. You will then gain the VATS Perk from Zimmer. When Zimmer attempts to leave to look for Harkness, you can still kill him and his bodyguard with no penalty from the locals. When you return to Harkness, he is none the wiser, and will acknowledge that you have killed Zimmer. By doing this, you will get both rewards and Harkness will remain in Rivet City.
To get the Ghoul Mask, you must complete the Tenpenny Tower quest, which requires you to find a way to let the Ghouls live in Tenpenny Tower. The mask is useful if you are tired of fighting Feral Ghouls or in a location full of them. It makes them completely ignore you.
Complete each condition to get the allotted Trophies.
| Unlockable | How to Unlock
|
|---|
| - Kill all the Super Mutant Behemoths.
|
| - Collected 20 Vault-Tec Bobbleheads.
|
Gone With The Wind reference
When you first arrive at the citadel and make your way to Scribe Jameson, you will tell her that you had found a "Brotherhood of Steel Holotag". She will then say, "I have an offer for you". Scroll down to the bottom and one of the replies will be "Frankly, I don't give a damn", which is a reference to Gone With The Wind.
Here’s a great tip (though it will be obvious for some people).When you hack a computer in the game, you have four tries to hack it successfully. If you don’t hack it successfully on the fourth attempt (as in, you don’t guess the proper password), the station you’re trying to hack will permanently shut down. But if you only try three times and bail out of the process before trying for a fourth time, the password will reset, giving you three more options. You can do this indefinitely without risking shutting the terminal down.
When you're hacking, the excess symbols between viable passwords selected and used to your advantage. You'll need to find clusters of symbols bracketed by parentheses, such as (%$*!^*&&), which can be highlighted as a whole. Submitting this should result in a removal of a bad password or fully replenish your attempts. Remember: you can always back out and restart to avoid lockout. Happy hacking!
Hidden sniper rifle cache in Megaton
You can find a sniper rifle and other supplies hidden in a rock near Megaton.
Here is a great way to earn seemingly infinite amounts of caps, items, repairs and ammunition.
Find any shop-based trader. The supply shop woman in Megaton is an ideal choice. She has some high value items that you would otherwise spend a fortune on, including all the stuff for your house and a schematic for the Rock-It Launcher.
1. Sell her any stuff in your inventory that you don't need and complete the transaction. This will boost the amount of money she has.
2. Find something in your inventory that you have two of, or that you have one of as well as her. Sell this found item to her.
3. Check that the two like items are of different values once they are in her inventory. The bigger the difference in value, the better and the lower the cheapest item is the better.
4. Now buy back the cheaper of the two like items and complete the transaction, but do not leave the trade session. Look for the item in your inventory. The game should have glitched and the item should have gone up in value dramatically and should be 100% repaired, even though when you sold the item initially it wasn't.
5. If it isn't 100% repaired for whatever reason, sell the item back to her anyway and repeat step 3-4, trying a different item if necessary.
6. From here, the game will remain glitched and you will be able to sell the same item high and buy it back low until you have drained her money completely. If you want, you can hold onto the item as it will be fully repaired - simply keep it on the final round which will leave her with a small amount of money.
7. Either sell the item back to her again once she is out of money, or if you are keeping it, sell her something else of high value and she will owe you that amount. The transaction price will go dim and remain at whatever amount of money she has left.
8. Search through her inventory and find stuff you need. Stimpaks, ammo, miscellaneous item, weapons and armor are all fair game. Eventually, the transaction price will light up again and you may owe her a few caps depending on how much of her stuff you added to the deal. Complete the transaction.
9. If you wait three days she will have new stock and around 350 caps. The longer you wait, the more robust her inventory will become and the more caps she'll have for you to take when you're ready to do this all over again.
Infinite Experience in Andale
To try this, you’ll need to have the Mister Sandman perk activated, which will mean you have to be at least at level ten. You’ll also need a sneak skill of at least 60. If that fits your character, then travel to Andale. Andale is full of kids that can’t be killed (killing kids in Fallout 3 is an impossibility). During nighttime, when everyone in Andale is sleeping, break into various houses and kill the kids while sleeping using the Mister Sandman perk. They won’t die, but you’ll still be rewarded experience for having killed them. You can then repeat the process over and over again for infinite experience points.
Infinite Good Karma in Megaton
Here’s another technique for infinite good karma. If you head to Megaton, you can find the church for the Children of the Atom, religious people who worship the undetonated nuclear bomb which Megaton is built around. There’s a priest who will be near the bomb or in their building. Talk to him and he’ll ask for donations. Give him donations, and you’ll get a positive karma boost. Do this as much as you want for as much karma as you desire.
Note: Using the "Infinite XP" glitches can leave you weak. The higher level you are, the more difficult the game gets. You will encounter more and stronger enemies, and they will have better weapons in better conditions.
Use the following trick to get 5 experience points each time it is performed. Go to Craterside Supply (found in Megaton) with a few frag mines (so you do not have to re-equip the mines). Go into the room behind the mercenary. Get close to the back side of the wall that the mercenary is leaning against, and place a mine. Quickly pick it up as it will immediately be armed and ticking. Repeat this as many times as desired.
Have a Speech skill of at least 30. Visit Big Town by travelling northwest from Springvale Elementary. Talk to Bittercup about her dating exploits. Talk with Pappy about how he came to Big Town with Bittercup to start a Speech challenge. If you fail, the challenge will still be available to retry. Repeat the challenge until you are successful. You will get six experience points, and the option to retry the challenge can still be selected. Repeat the challenge as many times as desired. Note: This requires the unpatched version of the game.
Be at least level 10, and have a 60 Sneak skill. Unlock the Mister Sandman perk. Go to the Smith's house at Andale. Sneak upstairs at night while everyone is sleeping. Try to pickpocket the boy, but instead select "Murder". You will not lose Karma and gain over 50 experience points. Because the boy does not actually die, you can repeat this as many times as desired. Note: The game may glitch and become unresponsive. Also, this requires the unpatched version of the game.
If you talk to Jericho about going back into the wastes, he will join you if you give him 1,000 Caps for supply money.
This is a special hunting rifle. It is located, in perfect condition, inside a display case on the top floor of the Museum of American History offices. It can be repaired using regular hunting rifles, but uses .44 Magnum ammo instead of the regular .32. It is also very accurate, with a 0.00 spread. Its damage is 50.
This weapon can be found in a safe inside Fort Independence.
If you want to avoid breaking precious Bobby Pins when picking various locks in Fallout 3, exercise patience. If you’ve failed opening the lock on the first two tries, chances are a third try will break the Bobby Pin. If you back out of trying to pick the lock and then immediately reattempt it, however, your Bobby Pin’s strength will reestablish itself, giving you several more tries. Repeat this technique to never break a Bobby Pin.
This is a schematic weapon. It is built from a Nuka-Cola Quantum, tin can, turpentine, and Abraxo Cleaner. One of the schematics can be found on the bottom floor of the Yao Guai Cave, in the northwestern-most area, under a pile of skeletons. Doc Hoff sells one of the schematics, and Sierra Petrovita in Girdershade has the third, which she gives you as a reward for the "Nuka-Cola Challenge" quest. Every schematic increases the number of grenades created per set of materials, up to a maximum of three. Its damage is 501 plus fire damage plus radiation.
In the Underworld (located inside the Museum of History), there is a ghoul named "Mister Crowley". This is a reference to a song by Ozzy Osbourne called "Mr.Crowley".
In the Underworld (located inside the Museum of History), there is a ghoul named "Mister Crowley". This is a reference to the "Mr.Crowley" song by Ozzy Osbourne.
The location of pimp type clothing is as follows:
Tenpenny: Tenpenny Tower
Eulogu Jones: Paradise Falls
Shadey Hat: Wasteland Survival Guide Mission (optional quest reward)
Mr. Burke: Megaton or Pre-War business wear
Platinum Trophy (Platinum)
Collect all other 50 Trophies for this Trophy.
The code to activate Project Purity at the end of the game is "216".
Prototype Medic Power Armor
You can find the Prototype Medic Power Armor in Old Olney in the northeast section of the map. The area is swarming with Death Claws. Set the difficulty to "Very Easy", and go there. On the southern-most street of the town is a grate on the sidewalk. Step on it, and it should open out from underneath you, effectively forcing you to go through the sewers. Fight your way through the sewers. Eventually you will find a ladder to your left. Keep going forward to find a Brotherhood of Steel Initiate. She will be wearing the armor. The armor talks and will inject you with Med-X when your limbs are crippled. It is as good, if not better, than Tesla Armor, but does not come with a helmet.
Here's an awesome technique to save Action Points (AP) used in VATS. If you're feeling confident when fighting an enemy or group of enemies, simply aim at an enemy in VATS, but don't fire. You'll retain your AP but still be aiming at the part of the enemy's body in question that you were in VATS. If you shoot quickly enough, you should still strike the desired area without having to expend any AP whatsoever.
In the Republic Of Dave, during the election tell Dave's son, Bob, that he is not meant to lead. He will reply, "Oh yeah? Well... .er... So's your face!" This is a reference to an episode of the television show Scrubs where whenever Dr. John Dorian (JD) gets insulted, he only replies "So's your face."
Secret Nuka-Cola collection in Girdershade
North of the Dunwich Building in the southwestern part of the map is a town called "Girdershade". Once there, you will find two shacks. One of them is Sierra Petrovita's home. Enter her shack to find the only Nuka-Cola collection in the game.
Secret weapons cache in National Guard Armory
There is a hidden area in the National Guard Armory that contains an experimental MIRV gun (the most powerful weapon in the game) and the Small Arms bobblehead.
This is a schematic weapon. The Shishkebab is built from a motorcycle gas tank, motorcycle handbrake, lawnmower blade, and pilot light. One of its schematics is found with Vance, who gives it to you after the "Blood Ties" quest. Lucky Harith, the wandering merchant, has another. The final set is near a workbench in a Red Brotherhood Outcast shack, to the southwest of SatCom Array NN-03d. The shack does not appear on the map, but is at the base of the hill the array is built on. Every schematic you obtain increases the condition of the weapon when it is built. Its damage is 40 plus 10 fire damage over five seconds.
Shoot Em In The Head quest: Rigged election
When on the "Shoot Em In The Head" side quest in the Republic of Dave, win the Speech challenges to be get the key and be allowed to stay. Ask Dave if there is anything to do to help with the elections. He will ask you to get everyone to vote. Go to Bob and Rosie and get them to run for President. Get everyone to vote. Inform Dave you are finished then run to the ballot box and hide behind it. It is locked but keep pressing on it until Dave comes to open it. You will see the ballots. You can now rig the election.
Complete each condition to get the allotted Trophies.
| Unlockable | How to Unlock
|
|---|
| |
| |
- Last, Best Hope of Humanity
| - Reached Level 20 with Good Karma.
|
| - Discovered 100 locations.
|
| - Reached Level 20 with Neutral Karma.
|
| - Reached Level 20 with Bad Karma.
|
| - Won 50 Speech Challenges.
|
| - Completed "Take it Back!".
|
| - Made one of every custom weapon.
|
| - Collected 10 Vault-Tec Bobbleheads.
|
Star Trek: Voyager reference
Inside the Citadel there is a robot doctor. When you speak to it, he will say "Please state the nature of the medical emergency". This is a reference to the emergency medical holographic doctor from the television series Star Trek: Voyager and movie Star Trek: First Contact. This is the same thing he says when he is switched on.
Stowing Goods on Dead Bodies
Here’s another great technique, if you’re carrying too much stuff and find yourself encumbered. You know how you can search downed enemies’ corpses for the goods they carry? Well, you can also place your own goods onto the corpse. Since corpses tend to stay around after they die seemingly indefinitely (or, at least, for a good long time), you can drop presently unneeded items onto the corpse of a foe you’ve slain, and then go back at a later date to get your stuff back. This is a great way to never become encumbered.
Super Mutant Behemoth locations
There are five Super Mutant Behemoths that can be found and killed. After they die, they will not respawn. You can find them at the following locations:
Evergreen Mills: At the bandit camp near Vault 112, a Behemoth is behind an electric enclosure beside the train tracks. When the generator powering the enclosure is destroyed, the Behemoth will escape.
Galaxy News Radio: This Behemoth will destroy a wall just outside the GNR Building as you enter the area (quest related).
Jury Station: Go west until you find a group of crumpled up train cars. Search this area until the Behemoth appears. You will know you are in the correct area if you see a teddy bear in a shopping cart.
Takoma Industrial: Located east of the GNR Building at the end of the map. The Behemoth is just north of the factory, standing in the middle of some wrecked cars.
The Capitol Building: Use the west entrance, and go inside the main room. Look on the map. The room is straight down the hall from the entrance. However, debris will force you to find an alternate route there.
If you want to earn infinite amounts of good karma, head to Big Town. If you go there at night, the town will come under attack from a Super Mutant raiding party. For each Super Mutant you help the few residents of Big Town slay, a small amount of good karma can be earned. Repeat this process as much as you want for the amount of good karma desired.
Successfully complete the "You've Gotta Shoot Them In The Head" mission given by Mr. Crowley in Underworld. Return to him once you have all four keys. Follow him out of Underworld, and take back the keys. Go to "Fort Constantine", located in the upper-left corner of the map directly between and slightly to the north of "SATCOM Array NW-05a" and "SATCOM Array NN-03d". Enter the little house on the left named the "CO Quarters". Go downstairs, and use the key on the "launch control bunker" door. Be prepared to fend off robots while making your way further down. Eventually you will find doors for all the keys, the last one being a room that holds the T-51b under glass. Use the computer to free the armor.
This is a special combat shotgun. It is in the possession of Smiling Jack at the Evergreen Mills Bazaar. To get it, you must either kill him, shoot it out of his grip and pick it up before he does, or break it in V.A.T.S. so he puts it into his inventory. If you use the third method, put your weapon away immediately or Jack will attack you. It is important to note that the Terrible Shotgun has much more spread than any other shotgun. It is to be used as a close-combat weapon only because it is wildly inaccurate. It can be repaired with regular combat shotguns, but degrades very quickly. Its damage is 80.
Head due north from the MDPL-13 Power Station and you'll soon find a small mountain. On the east side of this mountain you'll pick up a Recon Craft Theta radio signal. This will occur when you are just a bit north of an imaginary horizontal line through Greener Pastures Disposal Site to the far east. Search the east side of the slope for a destroyed house and you'll soon come across the source of the signal just west of that: a downed flying saucer. Its pilot can be found below the open cockpit (beware the radiation!). Near the pilot is the Alien Blaster and a bunch of ammo rods. This powerful weapon gets critical hits frequently and is the bane of Behemoths. You'll find ammo for it randomly throughout the wasteland if you're lucky, so use the ammo you'v got sparingly!
The Elder Scrolls 3: Morrowind reference
Early on, when you are turning ten, Lady Palmer will give you a sweetroll. After the robot destroys the cake, the local bully will demand your sweetroll. This is a reference to one of the questions in Morrowind during the class questionnaire, and during The Elder Scrolls 4: Oblivion, where occasionally you will hear an NPC in Skingraad mention being accosted by a bully for their sweetroll.
The Elder Scrolls 4: Oblivion reference
There is a certain location where you can find a building named Fort Faragut. This is the name of the fort where Lucien Lachance lives for the Dark Brotherhood side story in The Elder Scrolls 4: Oblivion.
The Incredible Hulk reference
While searching for you, some robots can overheard saying "Don't make me angry, you wouldn't like me when I'm angry." This is a line that David Banner says repeatedly in The Incredible Hulk.
Tommy James And The Shondells reference
At Paradise Falls, there are two slaves around Eulogy's Pad named Crimson and Clover. They are Eulogy Jones' bodyguards. This is a reference to the "Crimson And Clover" song by Tommy James And The Shondells.
Go to fort Independence talk to the brother of steel outcast guard Morgan tell her you want to help find technology she say you have to talk to Henry Casdin. So go through the gate and talk to Henry and tell him you want to help find technology. He'll tell you if you find power armor or energy weapons he'll give you .556 ammo, grenades, radaway, or stimpaks. |
Submitted by cheatjester567If you have a sneak rating of at least 60, you can attempt this infinite goods trick, which takes place at Fort Independence. Head to Fort Independence with a bunch of Scrap Metal in your inventory. Once there, speak with Protector Casdin and tell him you’ve got junk you’d like to give him. In return, he’ll offer up 5.56mm Rounds, Frag Grenades, RadAways, and Stimpaks, and you can choose which you want. Then, save your game (in case you fail the following) and steal your Scrap Metal back from the Protector. Sell the Scrap Metal back to him over and over again, thereby netting you infinite amounts of 5.56mm ammunition, Frag Grenades, RadAways and Stimpaks.
If you’re heading into seemingly-hostile territory or simply want to survey the area around you for enemies you might not yet see, try hitting the VATS button over and over again as you make your character turn around, searching all angles. Doing so will alert you to any enemies you may not yet see by zooming in on them in VATS mode. You’ll realistically be unable to do damage to your foes from such a distance, but it’s a good way to spot foes before they spot you so you know what you’re getting yourself into before the crap hits the fan.
You can find a special Gatling laser weapon called Vengeance under an outcropping of rock jutting above a bloody lake at the far rear of the Deathclaw Sanctuary. Go as far southeast into the sanctuary as you can. It should open up into a large cave. You will see a large rock in the center of the cave. It is approachable from the south, and is illuminated by some glowing fungus. The bloody pond is filled with corpses, and next to one of them is Vengeance, which is in relatively good condition when found.
When you get to level 14, you can get the Adamantium Skeleton perk. This is a reference to the X-Men Origins: Wolverine movie where Logan is bonded to Adamantium and becomes Wolverine.
This is a special Chinese assault rifle. It is found on Prime's body in the diner near the Jury Street Metro Station. However, for Prime's body to be present, you must complete the computer puzzle in the Museum of Technology. This is an unmarked quest, also known as Jiggs' Loot. It can be repaired with regular Chinese assault rifles. Its damage is 64.
To get the Xuanlong Assault Rifle very easily, go to Megaton immediately after leaving the Vault. When you first arrive, you will meet the sheriff. Talk to him about the bomb, and tell him that you want to disarm it. He will agree, and you can go off to the saloon. Find Mr. Burke. He will ask you to rig the bomb to explode. Tell him "No", then tell the sheriff about Burke. Say that he might get someone else to rig the bomb, so the sheriff will go after him. Follow him, and when you get to Burke, he will shoot the sheriff with a silenced 10mm pistol. You can then let Burke leave or you can kill him with no penalties. You can even talk to him and still blow up the bomb. You can now search the sheriff legally and take his rifle, duster, and hat, as well as a key to the armory (but watch out for the robot guarding it inside).
More Cheats, Achievements