After collecting the Minecraft Diamond Sword, go to the QR code and vines hanging under a huge window in the back of a stone ruin to get a "Slash" option while near the vines. Select the "Slash" option to reveal the QR code. When read with a smart phone, it will display "You Are Not Here" when the Croatian text is translated into English, which is a reference to the game Antichamber.
In Area A: Hub Land, go to the Room 7 teleporter. Search the opposite end where another teleporter should be to find Developer's Island between the boarded up section and the Room 6 port.
Purple doors usually make an error sound when you try to bring an item through them. However, there is one particular door that says something different. Near the end of the game, reach Floor 5 of the Tower. You will encounter a puzzle that requires a mine to destroy a killer turret to progress. After the turret, place the fan parts and use a crate to activate a floor button. Collect the Jammer device, and fly to the area above it. Use the recording device twice to get through both energy fields. Keep the Jammer and continue to a purple door. Have any item, such as the Jammer held as you try to walk through the purple door. This door says "Hello" instead of making the standard rejection sound. Note: You will not be able to take the Jammer through the door.
Easy "Blessed Messenger" achievement
You must work towards the ending that implies you becoming a Blessed Messenger. To do this, collect all 49 red sigils, all 30 stars, and all 9 silver sigils. You must also discover the code to unlock the sixth level of the tower. The three numbers of the code can be found at the start of each Star World. They are written on the board directly in front of the teleporter. A Hub's Star World's board gives the first digit, B Hub's Star World the second, and C Hub's Star World the third. The code is randomly changed with each playthrough. After getting the complete code, use it to unlock the sixth level of the tower on one of the tower's terminals. Once there, solve the ultimate tetromino puzzle to become a Blessed Messenger. You will get the "Blessed Messenger" achievement at the end credits.
In Area C: Room 2, go to the ruins of a church with a red door. Walk through that door to enter a black hallway. Go to the window to see Fork Parker's office. Fork Parker is the fictional Devolver CEO that broadcasts on Twitter.
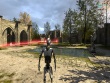
In Area C: Room 6, enter the first puzzle to the right. Enter the Sigil room that is guarded by a mine. Search the dark left corner covered in brush carefully to find a hole in the wall. Enter it to find the Diamond Sword stuck in a stone.
Nexus puzzle self-reference
Go to the World C Star Room, and solve the Nexuspuzzle by linking the lasers until you reach the end. Then, enable the "cht_bFly" code, and move your view above the maze. Look down to see that the lasers you positioned actually spell out the word "Nexus".
In Area B: Room 4, enter the Sphinx puzzle room, then turn around. Click the wall of hieroglyphics to find the red Papers, Please logo on the rock door. Go through the first door on the left, and examine the altar. Collect the small green item behind the vases in the left corner. Return to the door to pass through it. Inside is a movie theater where you can watch a short film featuring Serious Sam after you wait a short time.
In Area B: Room 5, get to the top of the ruin that you arrived in at the start of the room. Note: A box and fan are required to reach the top. Go through one of the teleporters to find a reference to Pink Floyd's "Dark Side Of The Moon" album cover.
Planet Of The Apes reference
From the entrance of Room B5, travel left to reach the shore, behind an enclosed puzzles. At the waterline is a submerged ruined structure featuring two long tops that are split down the center. Enter the water, and go to the base of the ruins. Examine the underwater sand near the center of the ruined wall that is facing the exterior of the map to find a hidden key. After collecting it, return to the front of the ruins, and use the fallen pillar as a ramp to exit the water and get on top of the ruins. Search near the left corner to find a viewfinder. Look through the viewfinder, and scroll slightly up from its original position to see the partially submerged Statue Of Liberty in the sand.
In Area B: Room 2, use the first puzzle on the left to link a red laser with the moon to display the Aperture Science logo. Additionally, in the same area is a hidden key in the nearby puzzle on the right that is used to access a telescope on the high stone beams. Use the viewfinder to get a closer look at the Aperture symbol on the moon to see Wheatley trapped above it.
Road To Gehenna: Steam Achievements
Complete the indicated task to unlock the achievement.
| Achievement | How to unlock
|
|---|
| - (no official description)
|
| - (no official description)
|
| - (no official description)
|
| - (no official description)
|
In Area C: Room 1, there are nine statue parts that can be found. When put together, they will create a statue of a Gnaar, a mutant enemy from the Serious Sam series. Go to the Weathertop puzzle, and make your way around to the back ledge. Look down to where a tree reveals a hidden lower platform. Drop down, and enter a cave that was partially obscured by another tree to discover Serious Sam frozen like Han Solo in carbonite. You can find the jetpack from Serious Sam by using the following steps. You must first get the star in Area C: Room 3. To do this, start at the "Weathertop" puzzle room, and turn left to find some wooden fences. Notice that one of the fences is slightly lower than the others, allowing you to see the star room. You must collect three Hexahedrons to create stairs in order to get over the fence. Complete the "Weathertop" puzzle to get two Hexahedrons to use, then go to the angled fan launcher that is not blocked by iron fences. Stack both Hexahedrons near the wall, and jump onto the fan, then to the Hexahedrons with a Connector equipped. Set down the Connector, and link a blue laser to lower the force field barrier that was blocking another Hexahedron. Use the three Hexahedrons to form stairs allowing you to advance to the star room. You must then complete four puzzle rooms, and return to the wooden bridge that leads to the castle ruins. Enter the "Big Stairs, Little Stairs" puzzle room. Starting at the entrance, travel to the cliffs along the right edge at the rear. Notice the ledge beneath you that can be reached without deactivating any force fields. Drop down to the first platform carefully, then go to a second platform found to the right. A third platform will be to your left, then a final one along the right edge. Once you drop down you will discover ruins inside a cave. Collect the four sigils in this room in order to bypass the walls. There is a star trap door at the end of the path. Finally, drop down into a water-filled chamber that has the jetpack in the rear corner.
The Lord Of The Rings reference
Just as you enter Weathertop, go to the ledge directly opposite from the entrance. Look down to see a scene from The Lord Of The Rings reenacted by a Gnaar hanging off the edge of the cliff.
As you first enter Area B: Messenger, follow the river upstream away from the objective to eventually reach an underwater cave under the outer edge of the map. Pass through it to find a statue head in a cavern after leaving the water. The statue is from the independent game The Swapper.
More Cheats, Achievements